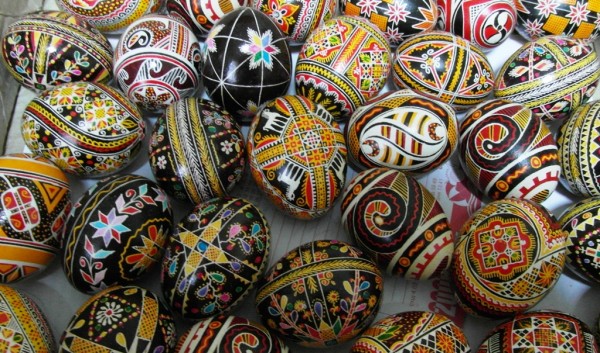
Learning the art of traditional Ukrainian egg painting (known as Pysanky) was not on my list of things to do on this trip. But when Oksana from Active Ukraine (who I found through Twitter!) said one of their guides, Olesia, could do a free class for me, I jumped at the opportunity.
What better way to bring out my non-existent artistic side, right?
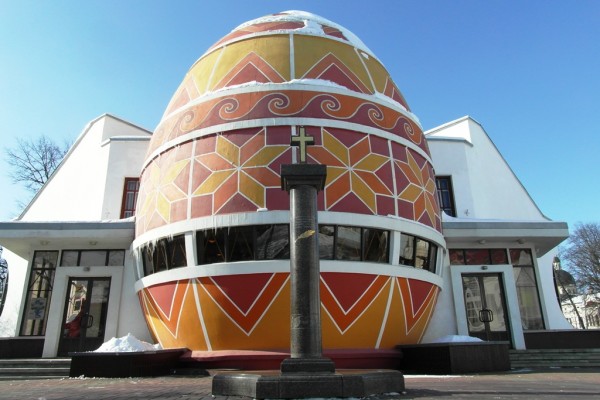
Overall, it was a fun four hours, learning about a tradition admittedly unfamiliar to me. As it turns out, Ukrainian egg painting likely dates back to ancient times and numerous folk legends and superstitions are associated with the art. Regions, villages and families all have their own rituals, symbols and meanings for the painted eggs. There is even a museum in the western Ukrainian town of Kolomyya dedicated to pysanky, with several thousand eggs on display (which I visited about a week later).
Learning how to paint an egg was full of surprises.
As soon as we arrived at Olesia’s apartment for the egg painting class, I got my first surprise – a carton of eggs sitting on Olesia’s table. Foolishly, I thought we would be painting wooden eggs – not real eggs!
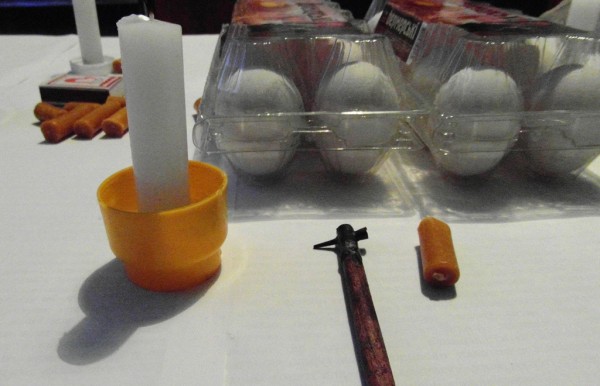
I was even more surprised to learn that the eggs were not hard-boiled, like we typically do with Easter eggs in the United States. On the contrary, our first step in the egg painting process was poking a hole in either end of the egg and blowing the yolk and egg white out of the egg.
This was not easy.
I am assuming it is related to the fact that I can’t whistle, but I also seem to be incapable of blowing anything out of an egg.
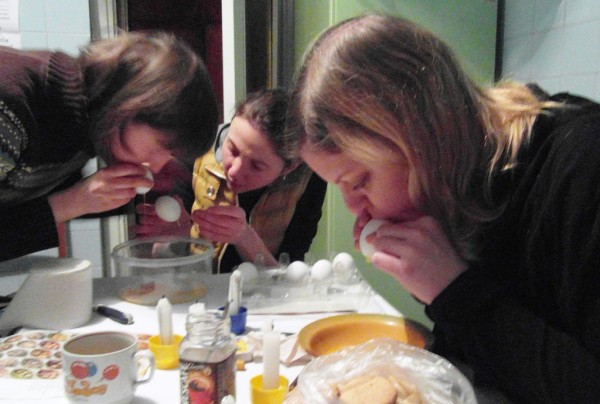
After about ten minutes of blowing with all my might (while being careful not to squeeze the egg too hard and splatter it all over myself), only the slightest bit of egg white dripped out of my egg. Sensing that I was a lost cause, Olesia took pity on me and handed me an egg that she had already emptied. Thank goodness she did or I might still be working on that egg!
With an empty egg in hand, I was ready to get started. Olesia provided us with sheets and sheets of sample designs and symbols to use if we wanted to create our own designs. Finding that slightly overwhelming, I decided to start by trying to just draw a simple line.
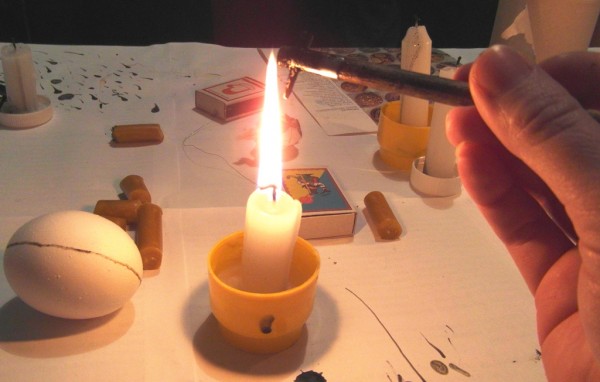
But first I had to master using my stylus – the instrument used to draw with melted wax onto the egg. Basically, I had to scoop some wax into a small cup at the top of the stylus and then hold it over an open flame (we used candles) until the wax melts. Then I used the stylus to etch the melted wax onto the egg.
Easier said than done.
While Olesia and her two friends made it look incredibly simple, I struggled to get the hang of it. Either I used too much wax and awkward blobs dripped onto my egg or I didn’t have enough wax and I couldn’t get anything to show up.
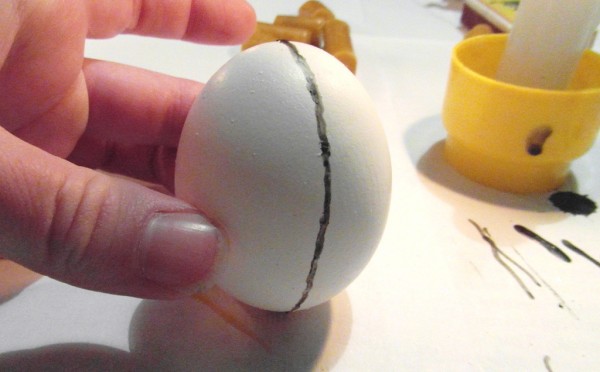
After what felt like an eternity, I finished my first line around the egg.
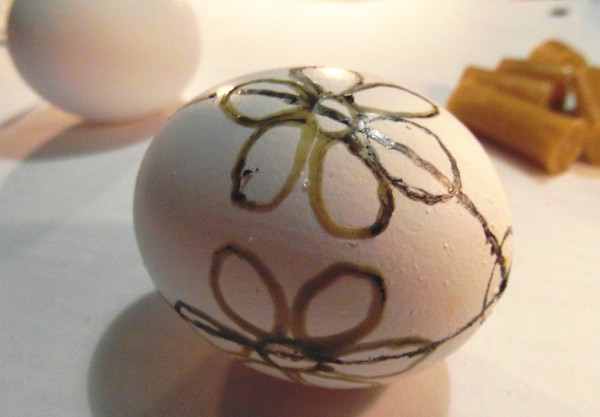
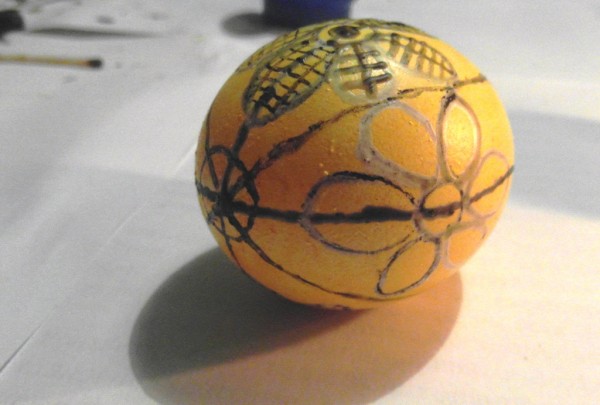
Growing in confidence, I decided to create my own design, using a flower that was supposed to symbolize love (hopefully creating a good luck charm that will send some romance my way).
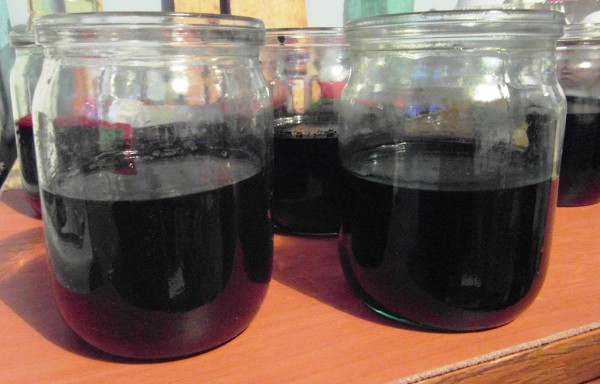
Once I completed the initial design in wax, it was time to dip the egg in the yellow dye – the eggs are typically dyed beginning with the lightest color, usually yellow. Everything I etched in wax would remain white.
A few minutes later, I dried off my yellow egg and got to work on the next phase of my design – adding lines inside of my flower petals. Everything I etched at this stage would remain yellow.
Although Olesia told me to think happy, positive thoughts while I painted, the perfectionist in me was fighting feelings of frustration. It seemed much harder to paint on the colored egg and I felt like my attempt at creating a very fine, detailed design was just looking sloppy.
It didn’t help that my egg started oozing leftover egg white from inside, making things quite messy.
As it turned out, I was also lacking when it came to the skill of hooking the egg holder to the side of the dye jar so that your egg stays submerged in dye. See the metal holder below? In theory, I should have been able to hook that to the side of the jar to hold my egg down. In reality, I could not for the life of me get it to stay so I ended up holding it myself.
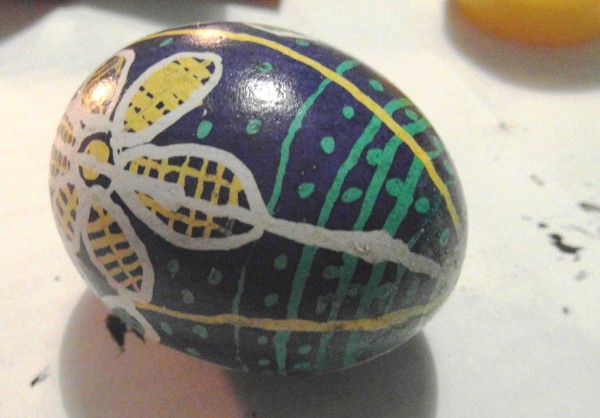
Finally, after rounds of yellow, green and purple dye that were oddly reminiscent of Minnesota Vikings colors, I was ready for the last stage in the process – melting the wax off the egg to reveal the whole design!
This involved holding the egg close to the flame on Olesia’s gas stove and then wiping the wax off with a paper towel as it melted – hopefully not burning myself or setting anything on fire in the process.
Finally, I had a finished product!
Of course, not satisfied with just one, I immediately embarked on painting a second egg. This time, I decided to skip the creativity and simply mimic an existing design.
I have to say, I think I showed some improvement!
Have you ever learned an art or craft while traveling? How did it go?




Pingback: EASTER IN UKRAINE – THE ONE WITH THE EGGS, EASTER BREAD AND THE BASKETS |
Pingback: 10 Things to Do in Lviv under 10 euros |
Those are such awesome eggs! I had no idea you could find classes like that. Now I know what to look for, thanks!
Sorry to hear that the eggs didn’t make it very long in one piece.
Ok this is way more complicated than painting Easter eggs! I think both of your eggs look pretty 🙂
Pingback: 5 Not-to-Miss Experiences in Ukrainian Carpathians |
I would LOVE to do this!!! How tedious it looks, though. Great job on your paintings!
My sweet little Ukrainian grandma had me painting eggs since I was little (we never blew the yolks out though?) Anyways, I still have a kit at home, and a few years ago I pulled it out and started making them again. I became a wee bit obsessed with it actually, until my eyes were going buggy and my hand was severely cramped! Your second egg is a common style we also used to “get the hang of it” when we would start back up each Easter! I’d love to do this in the Ukraine – will have to do it WHEN we get there someday!
Love it! I never even thought about removing the insides, but I guess that would be essential. Great post – and you’re making me want to head that way!
I had no idea that it was so intricate or involved! I also had no idea that you had to remove the insides of the eggs first… I can’t imagine I’d be able to do it, either! But this sounds like it was really cool!
That looks like so much fun! I love random activities like this on the road:-). Since you are on the go so much, am I correct to assume you didn’t take your egg with you? That would be the most disappointing thing to me!
It’s funny you should ask about taking the eggs with me. I initially planned to at least try to keep them with me until I got to Armenia in a couple weeks because I was already planning on sending stuff home from there. So I packed them up in a small box and carried them in my shoulder bag so as not to get crushed in my backpack. And then the first travel day I had to another city, I got lost and flustered and totally forgot about the eggs and got to my hostel to discover one of them broke.
The second one made it with me to my next stop, but there I got to talking to the owner of the B&B where I stayed about egg-painting and he told me that they don’t make it through customs because technically they are live/fresh food products. So I gave up then and ditched the second one too. 🙁
Your comments were hilarious 🙂 It’s always so exciting to see our traditions done by an outsider. You start noticing lots of small things about them then! 🙂 And your eggs look beautiful!! Way better than mine did, when I first started egg-painting 🙂
Haha, thanks Oksana! And thanks again for arranging!
How cool! Sounds like a fun few hours. I remember painting Easter eggs as a kid in Germany and it would all start with blowing the egg yolk and white out of the egg. Of course that also meant pretty much a guaranteed cake that afternoon, because of all the eggs 🙂 Anyways, ours looked much less artistic than yours and we never tried using wax on them either. Sounds like fun though!
Yep, definitely a fun time, although a tad bit frustrating because I am such a perfectionist! 🙂
Love that you made cake with all the egg yolks/whites – that’s a good reason for us to start doing that in the US. 🙂
I hear you on the perfectionist thing. Any kind of artsy thing is hard for me, because I hate when things aren’t exactly how I want them to be 🙂 That’s why I did painting clay stuff like cups and plates for a while with friends always with a few glasses of wine. Much better that way.
Maybe I should organize an egg painting thing with friends this year here in Texas… and make tons of cake. Introduce some German traditions 🙂
So cool that you learned to do this! I have a friend whose aunt does Ukrainian eggs, and ever since we became friends in first grade, my mom has bought a new egg from her each Easter. What a cool skill to have!
Very cool! Although it may be a slight exaggeration to say I actually have a skill now. 🙂
That’s amazing. And great job for your first time! I’m pretty sure if I attempted this, I would end up with something that looks like it was painted by an 4 year old.
Thanks John!